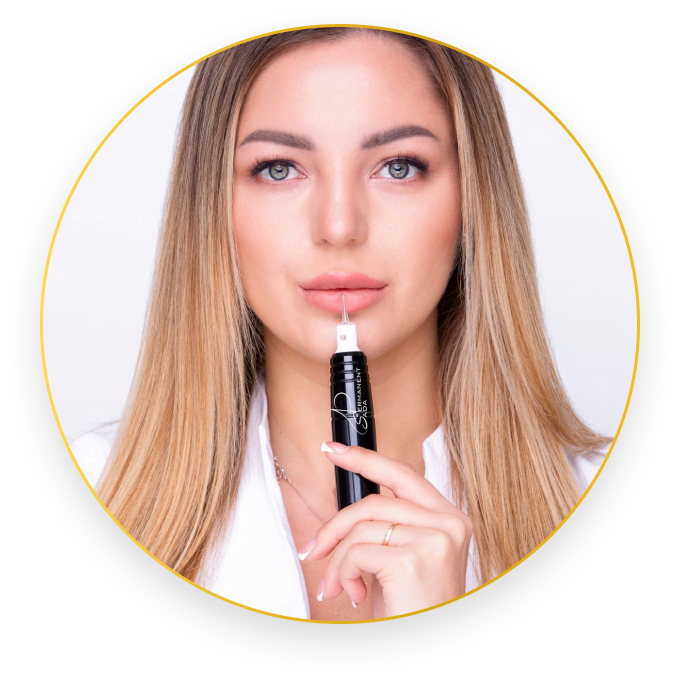
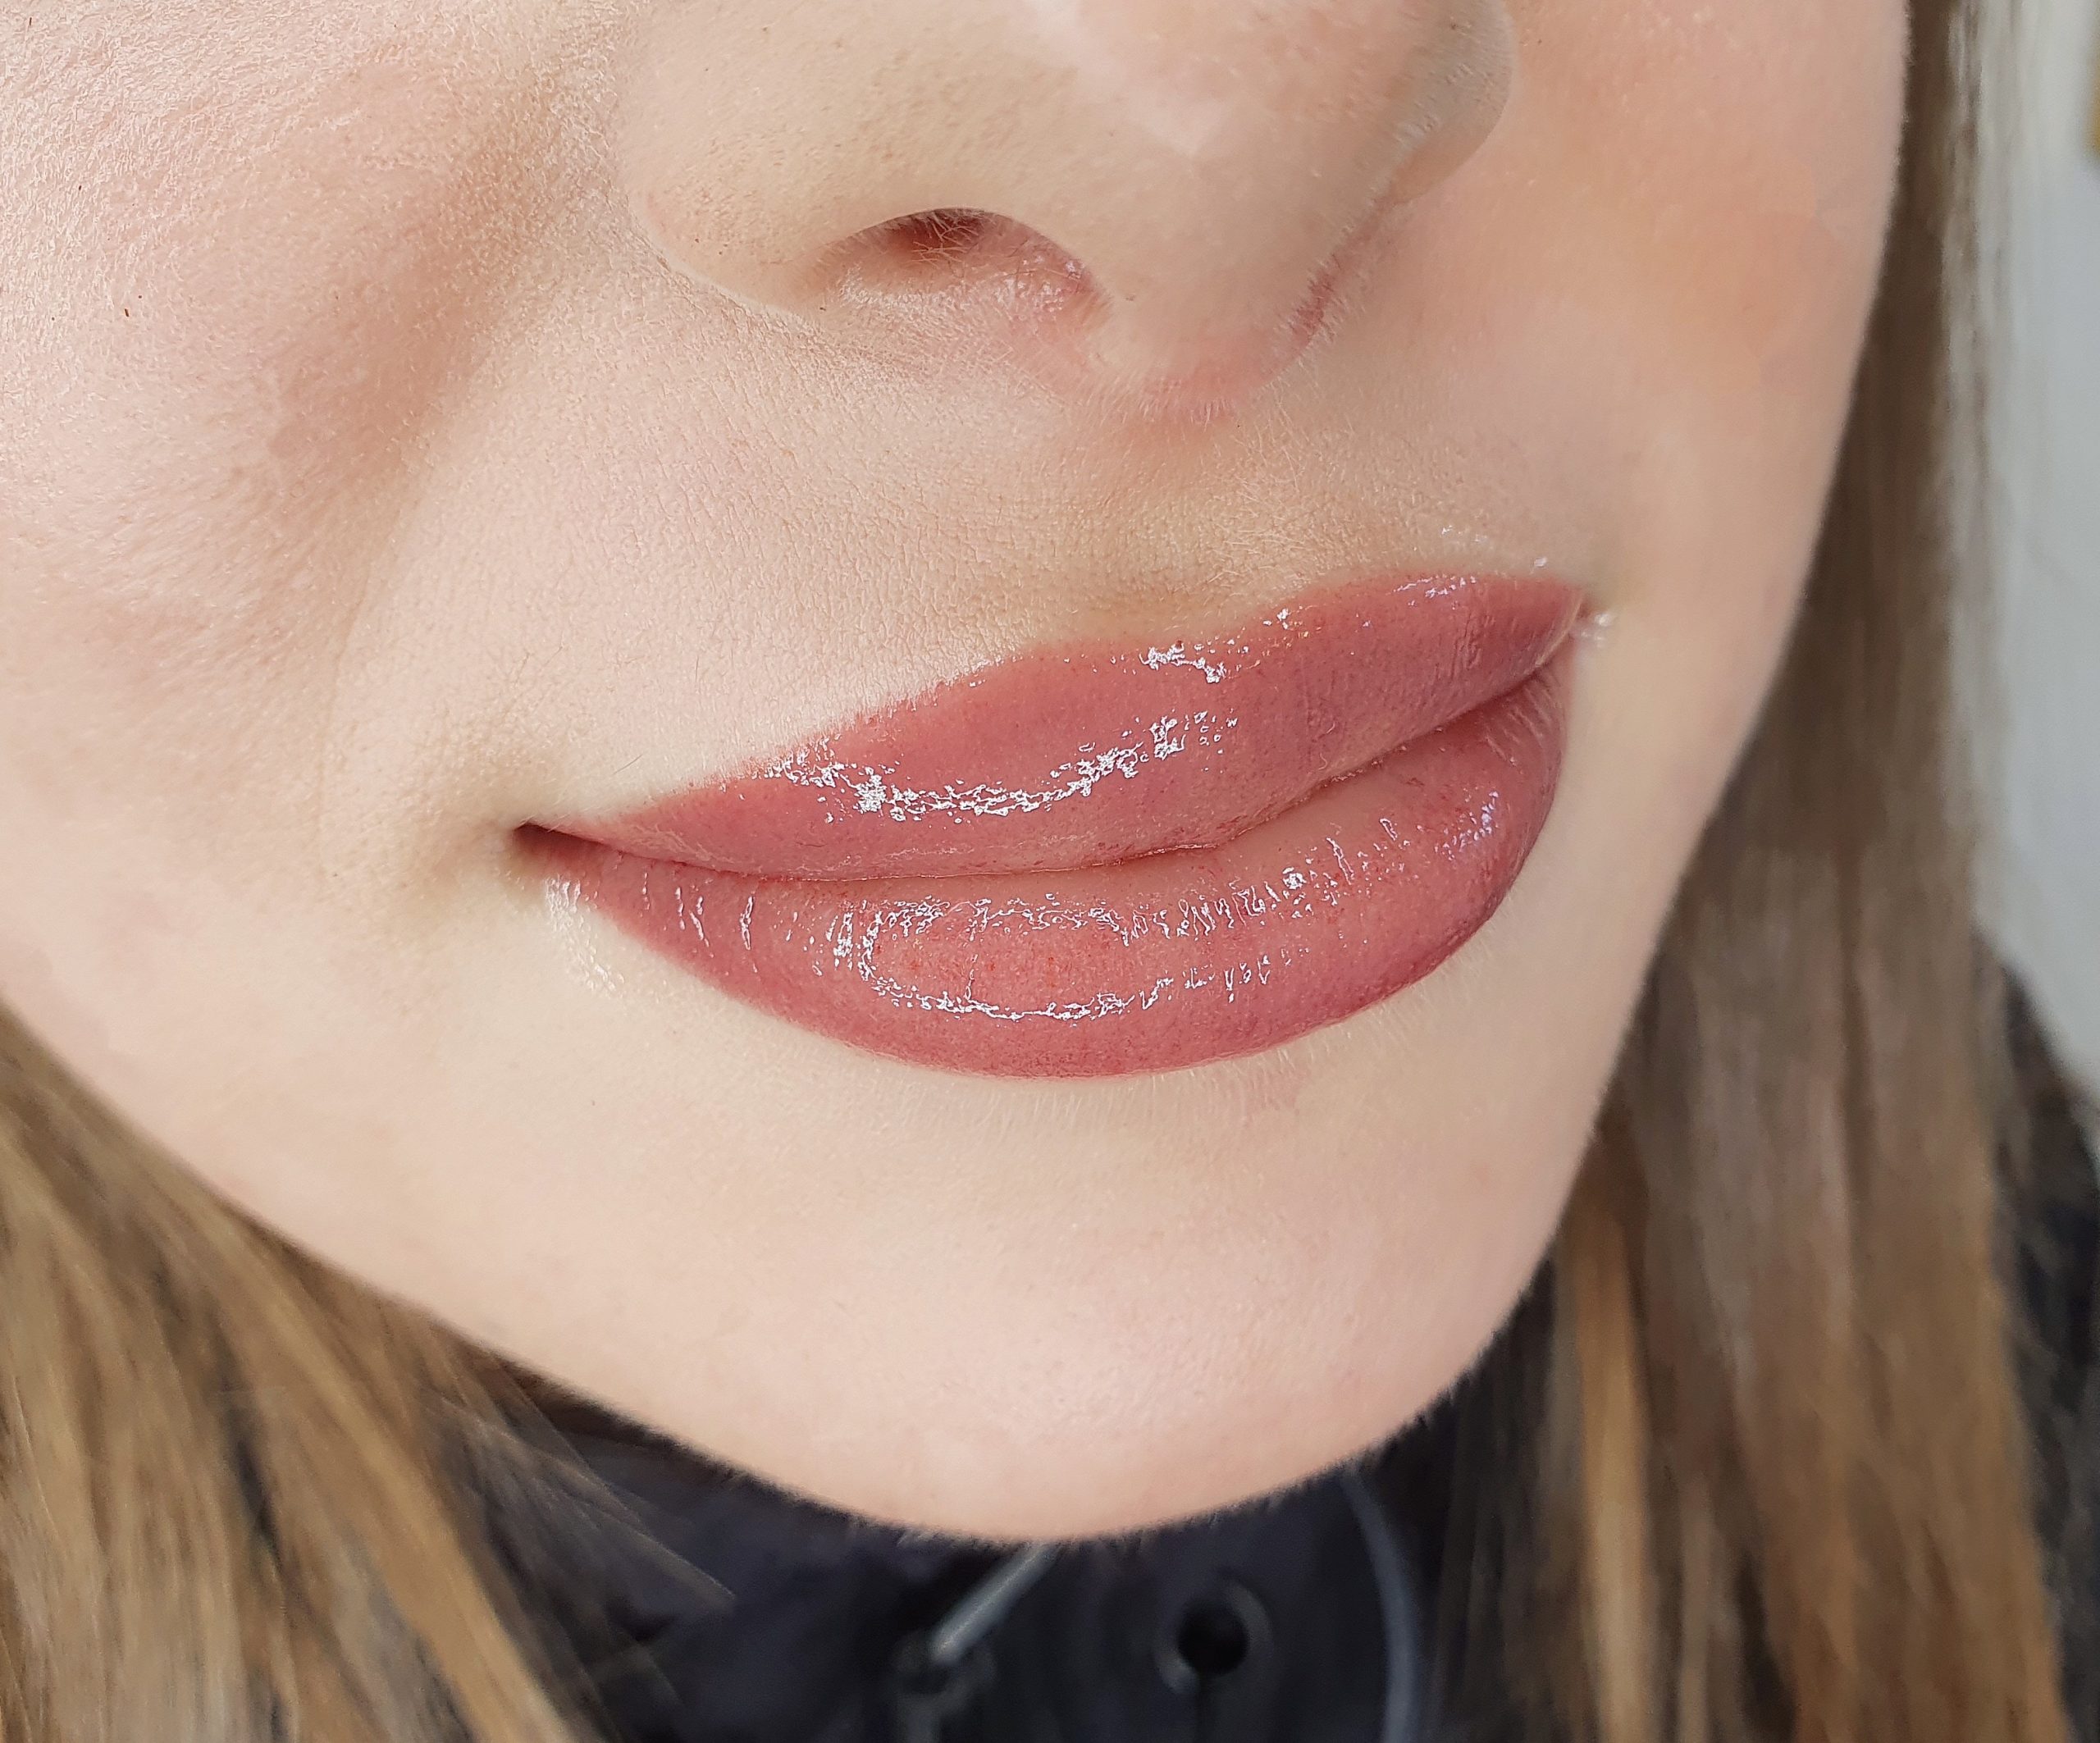
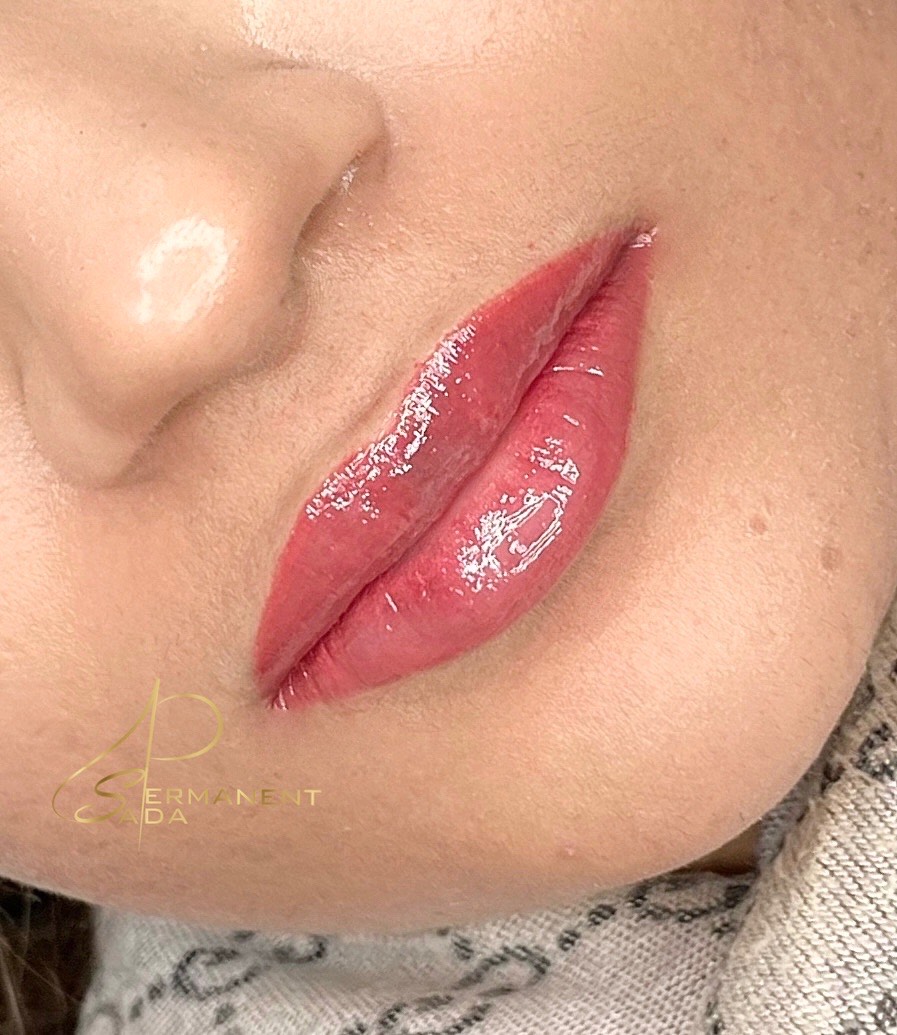
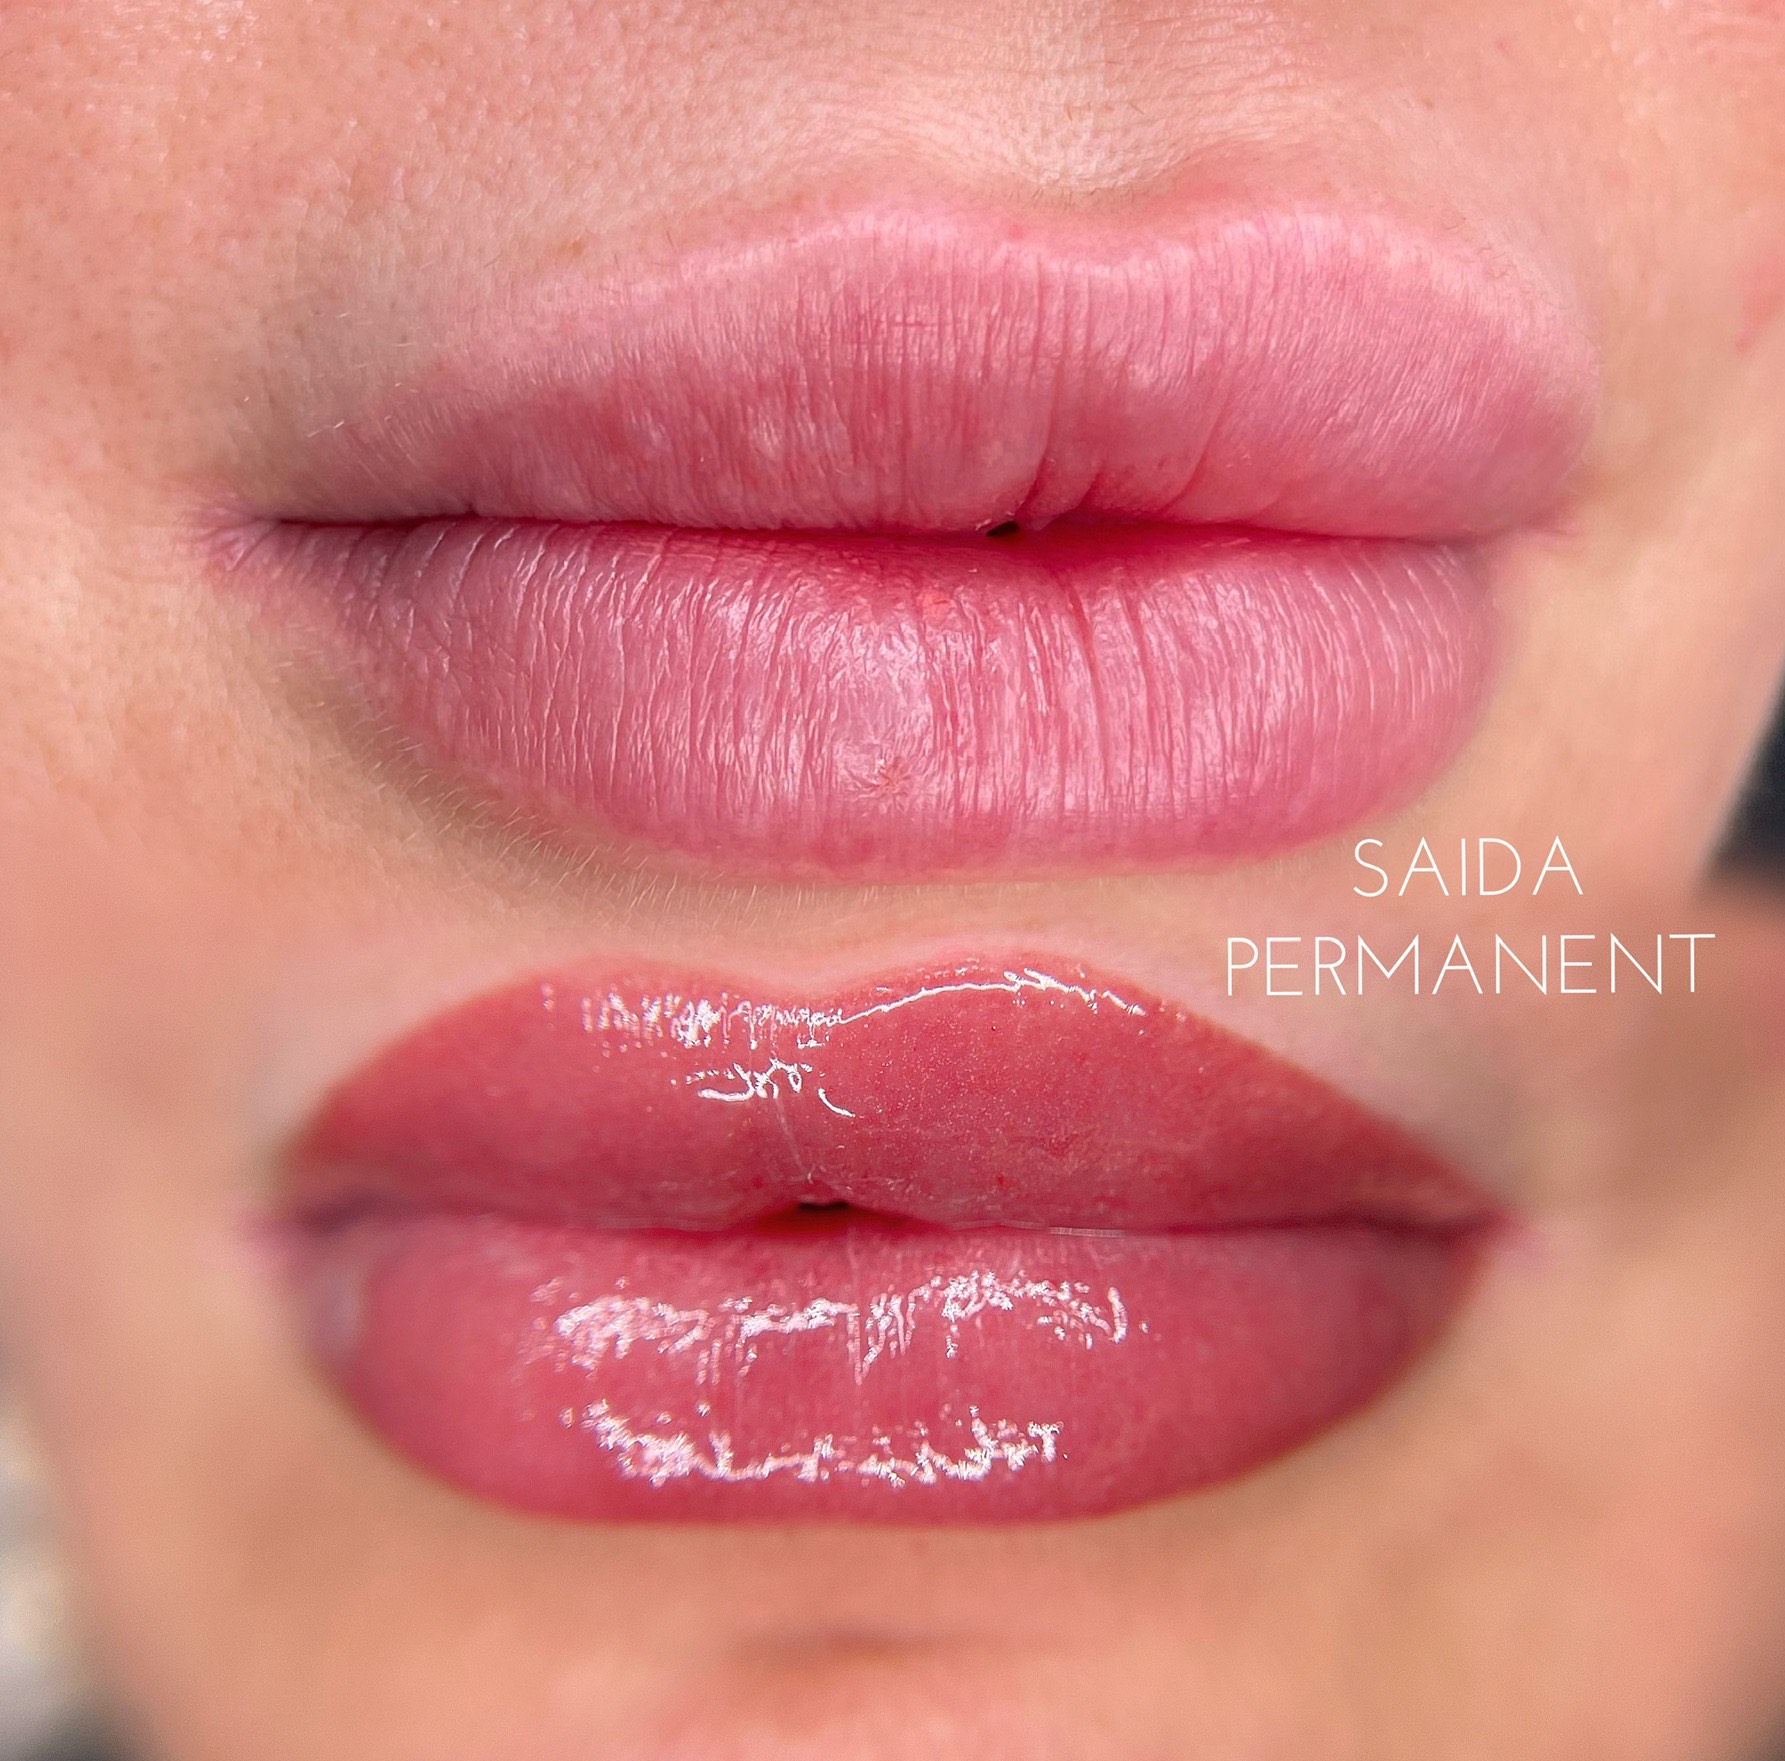
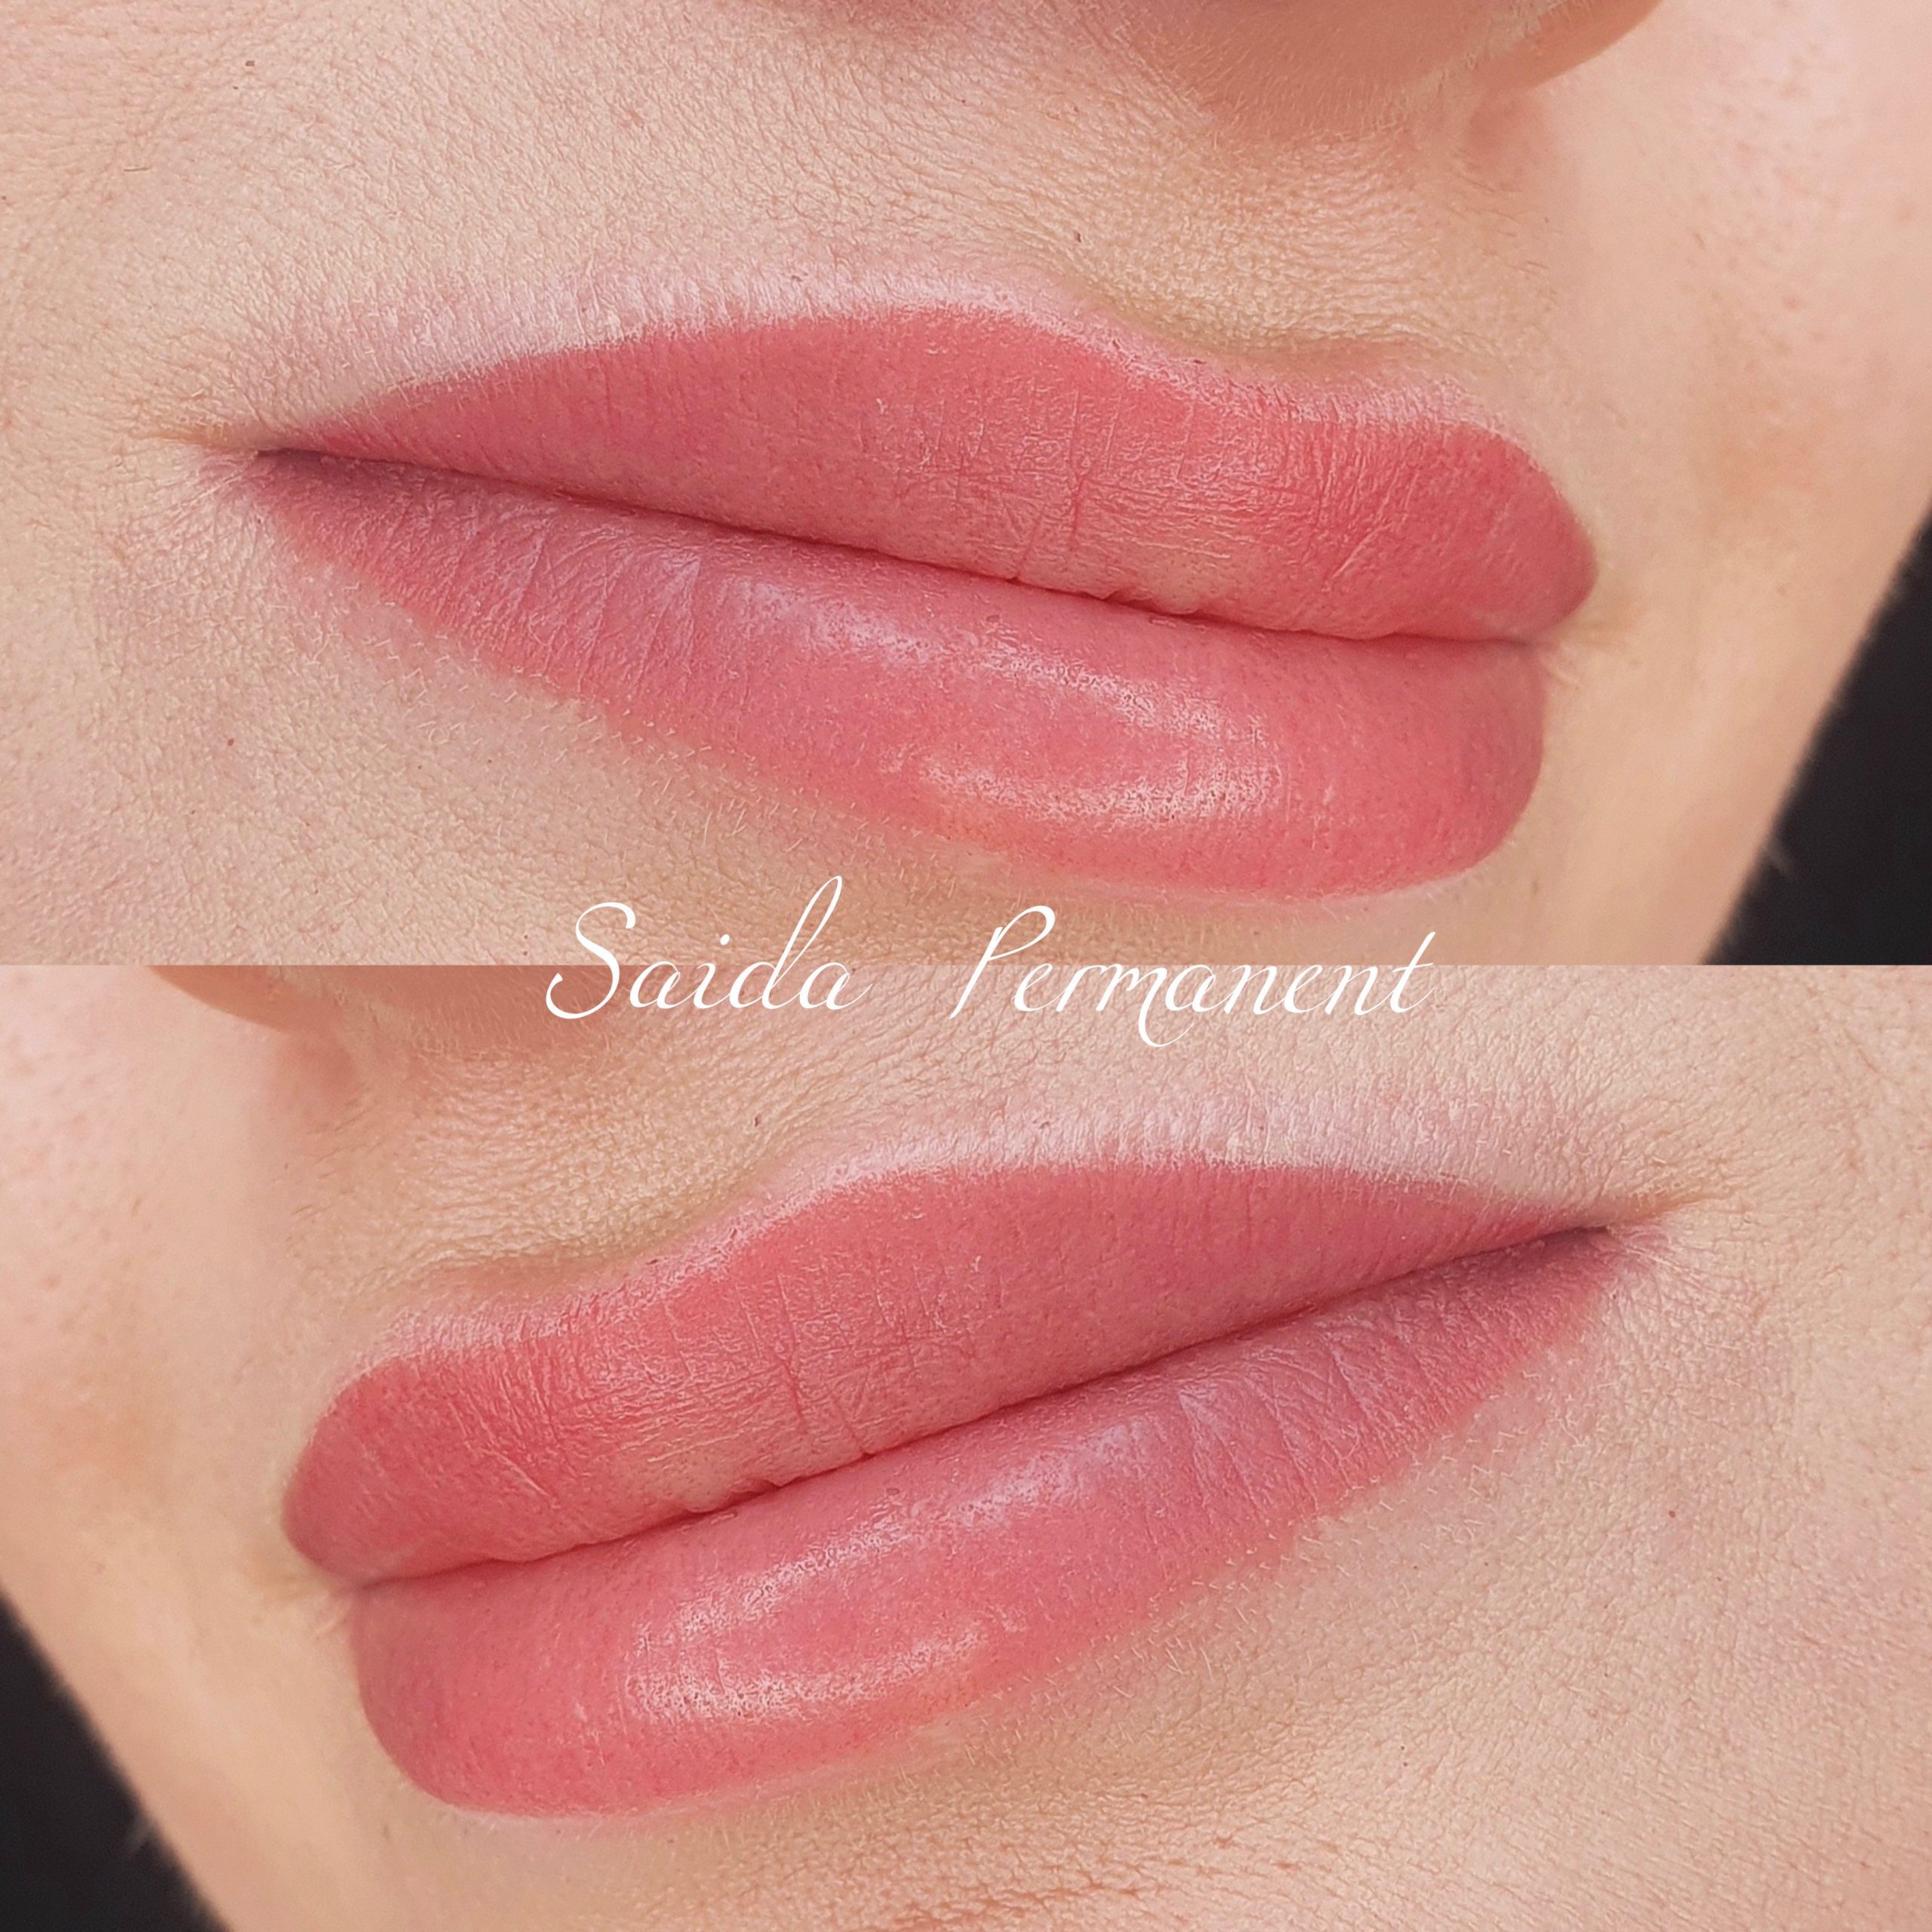
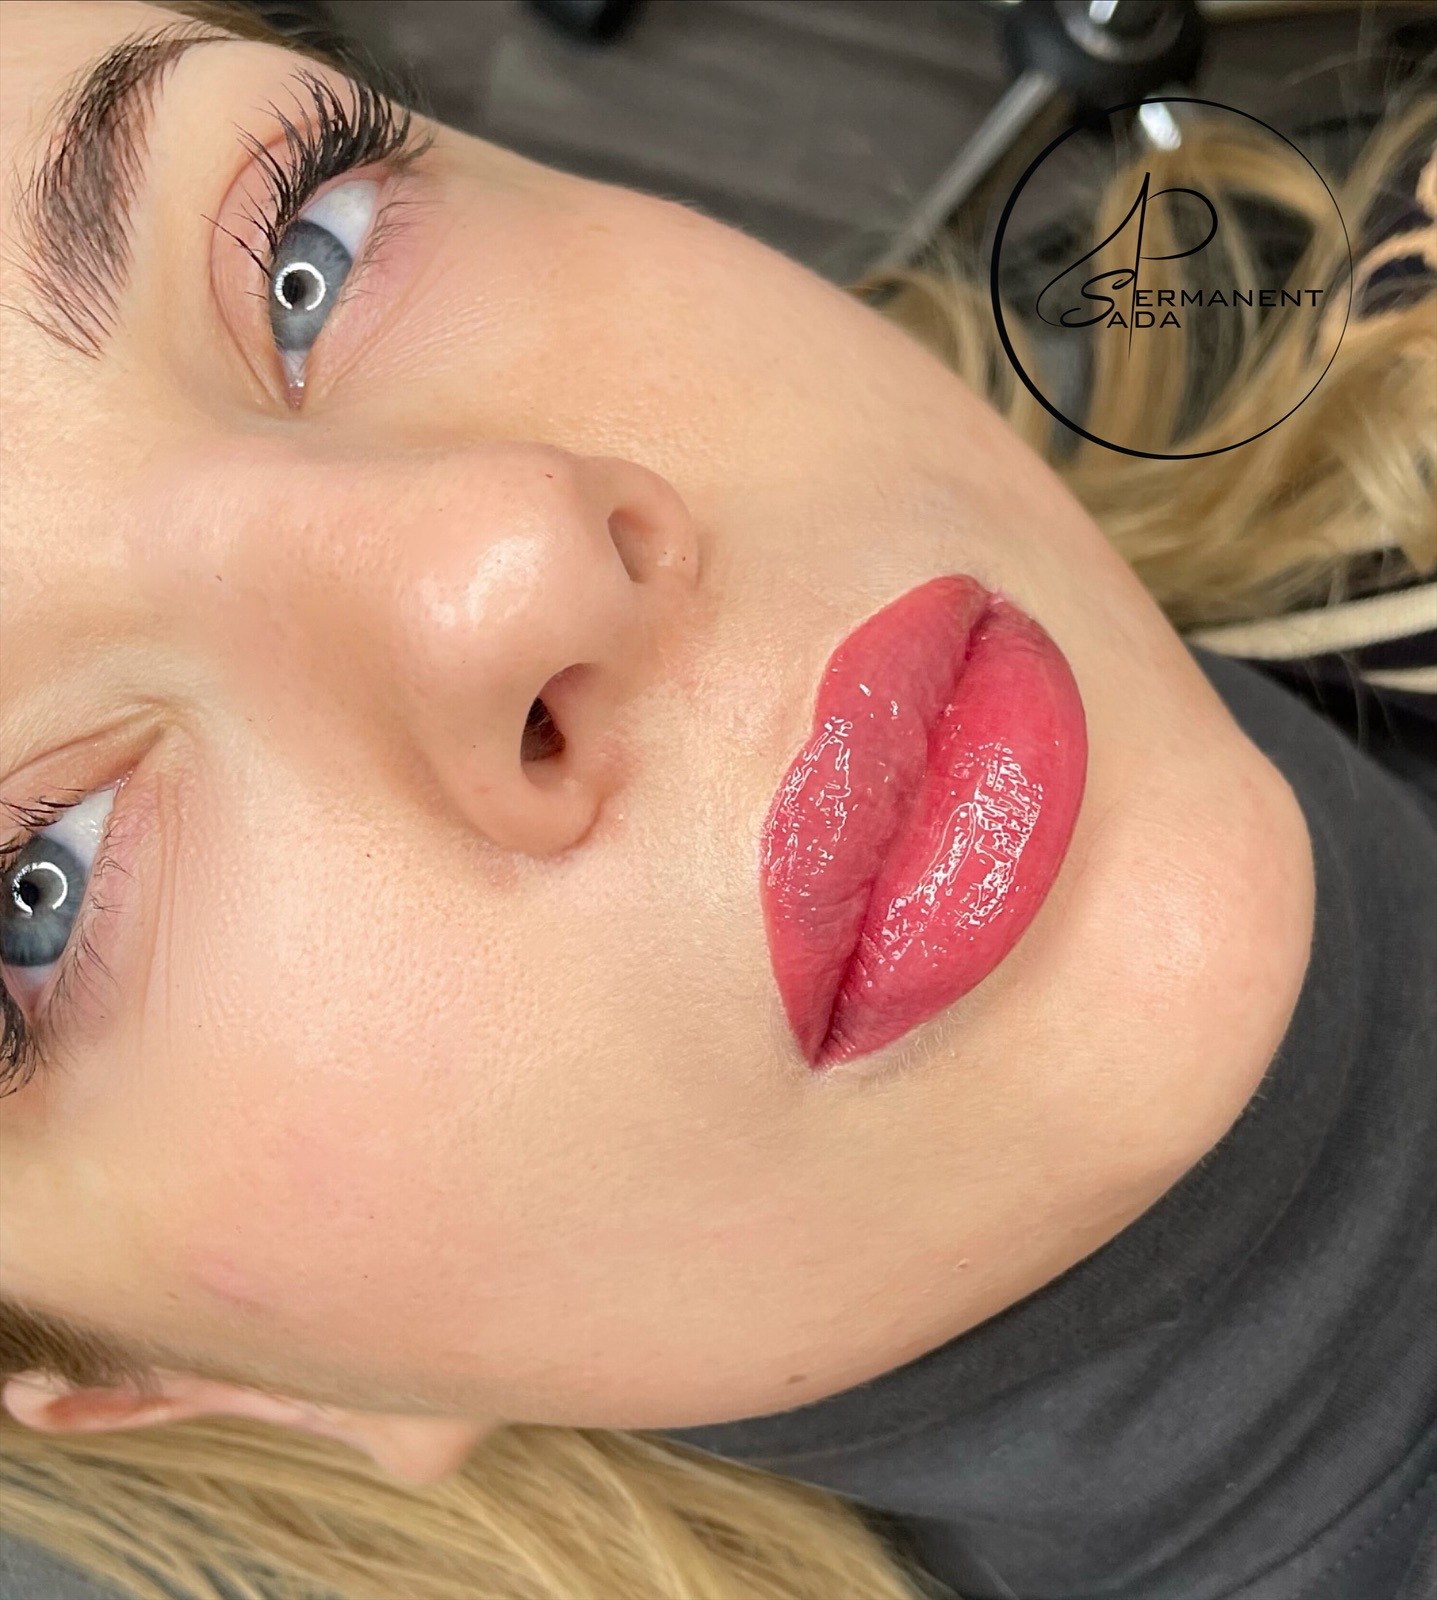
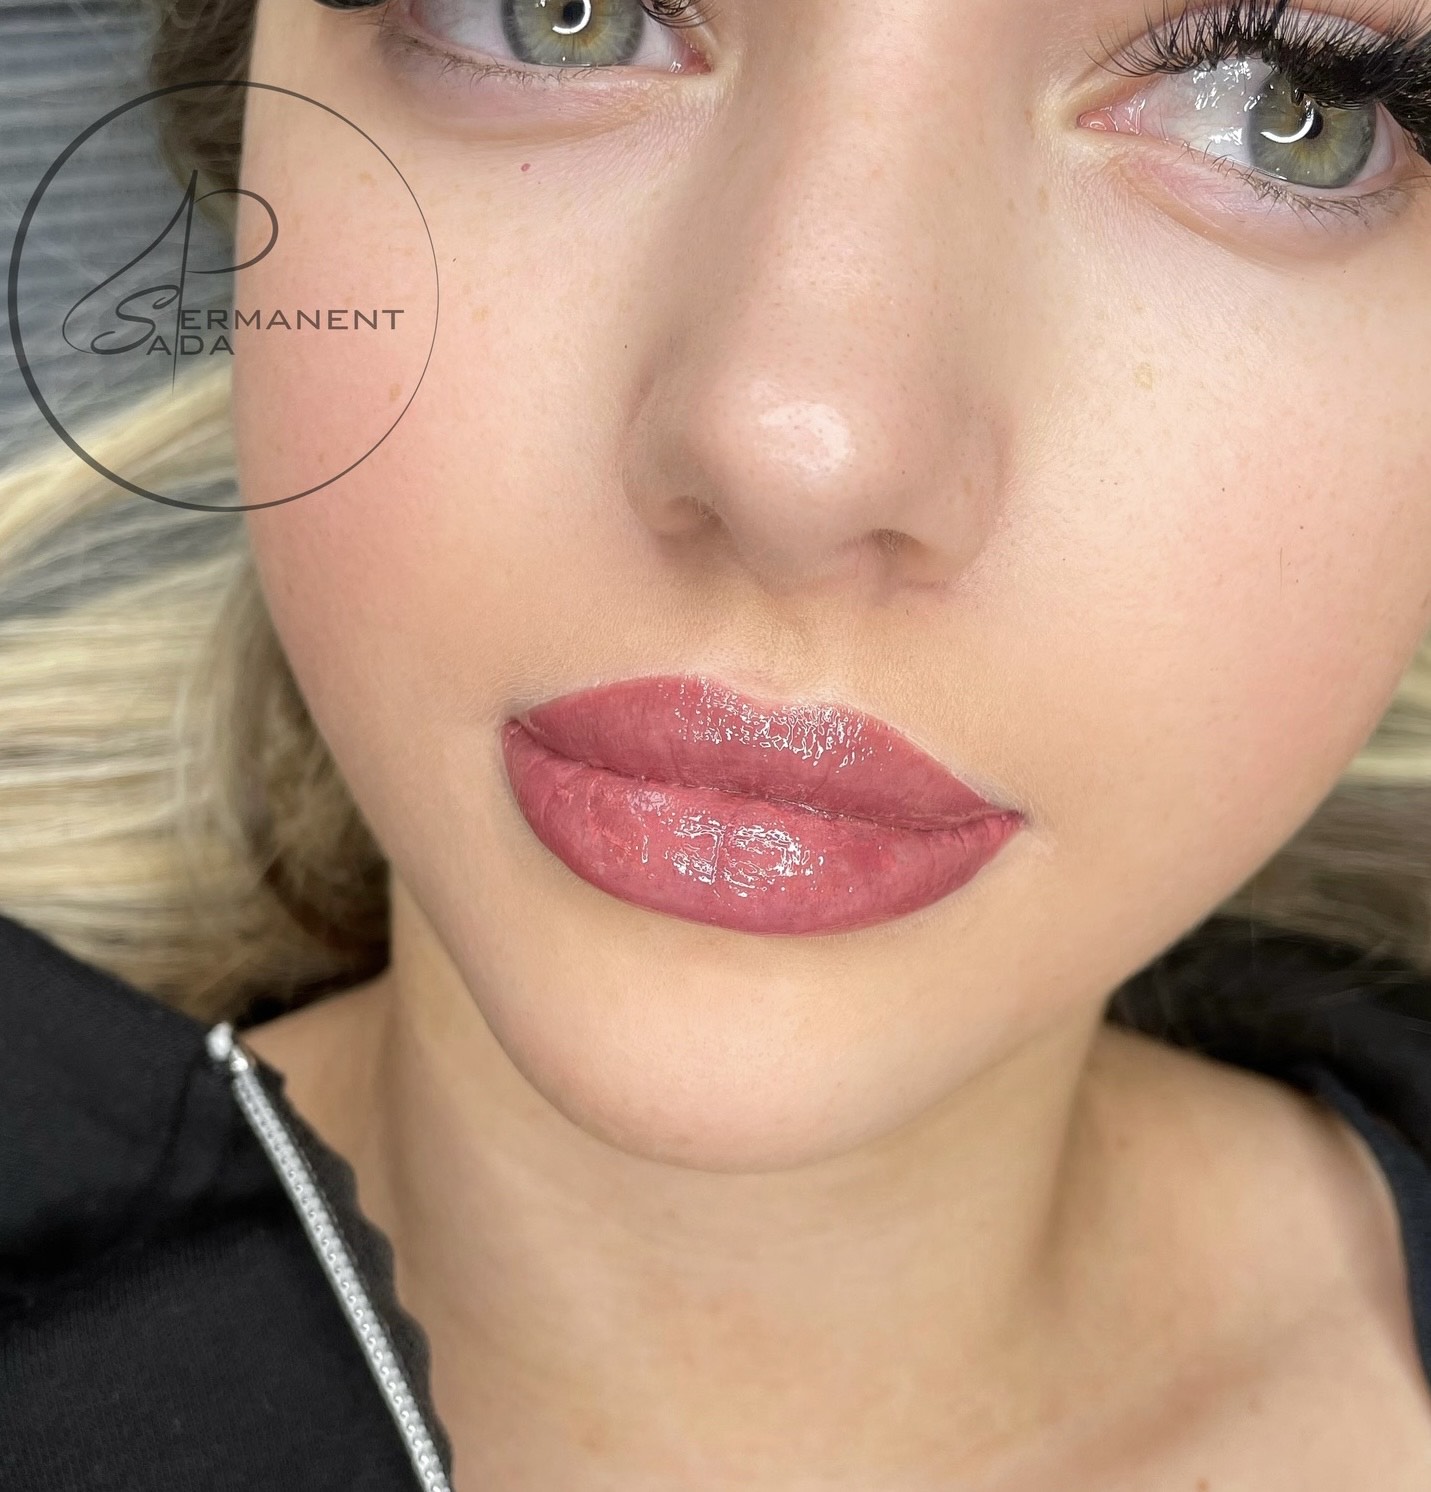
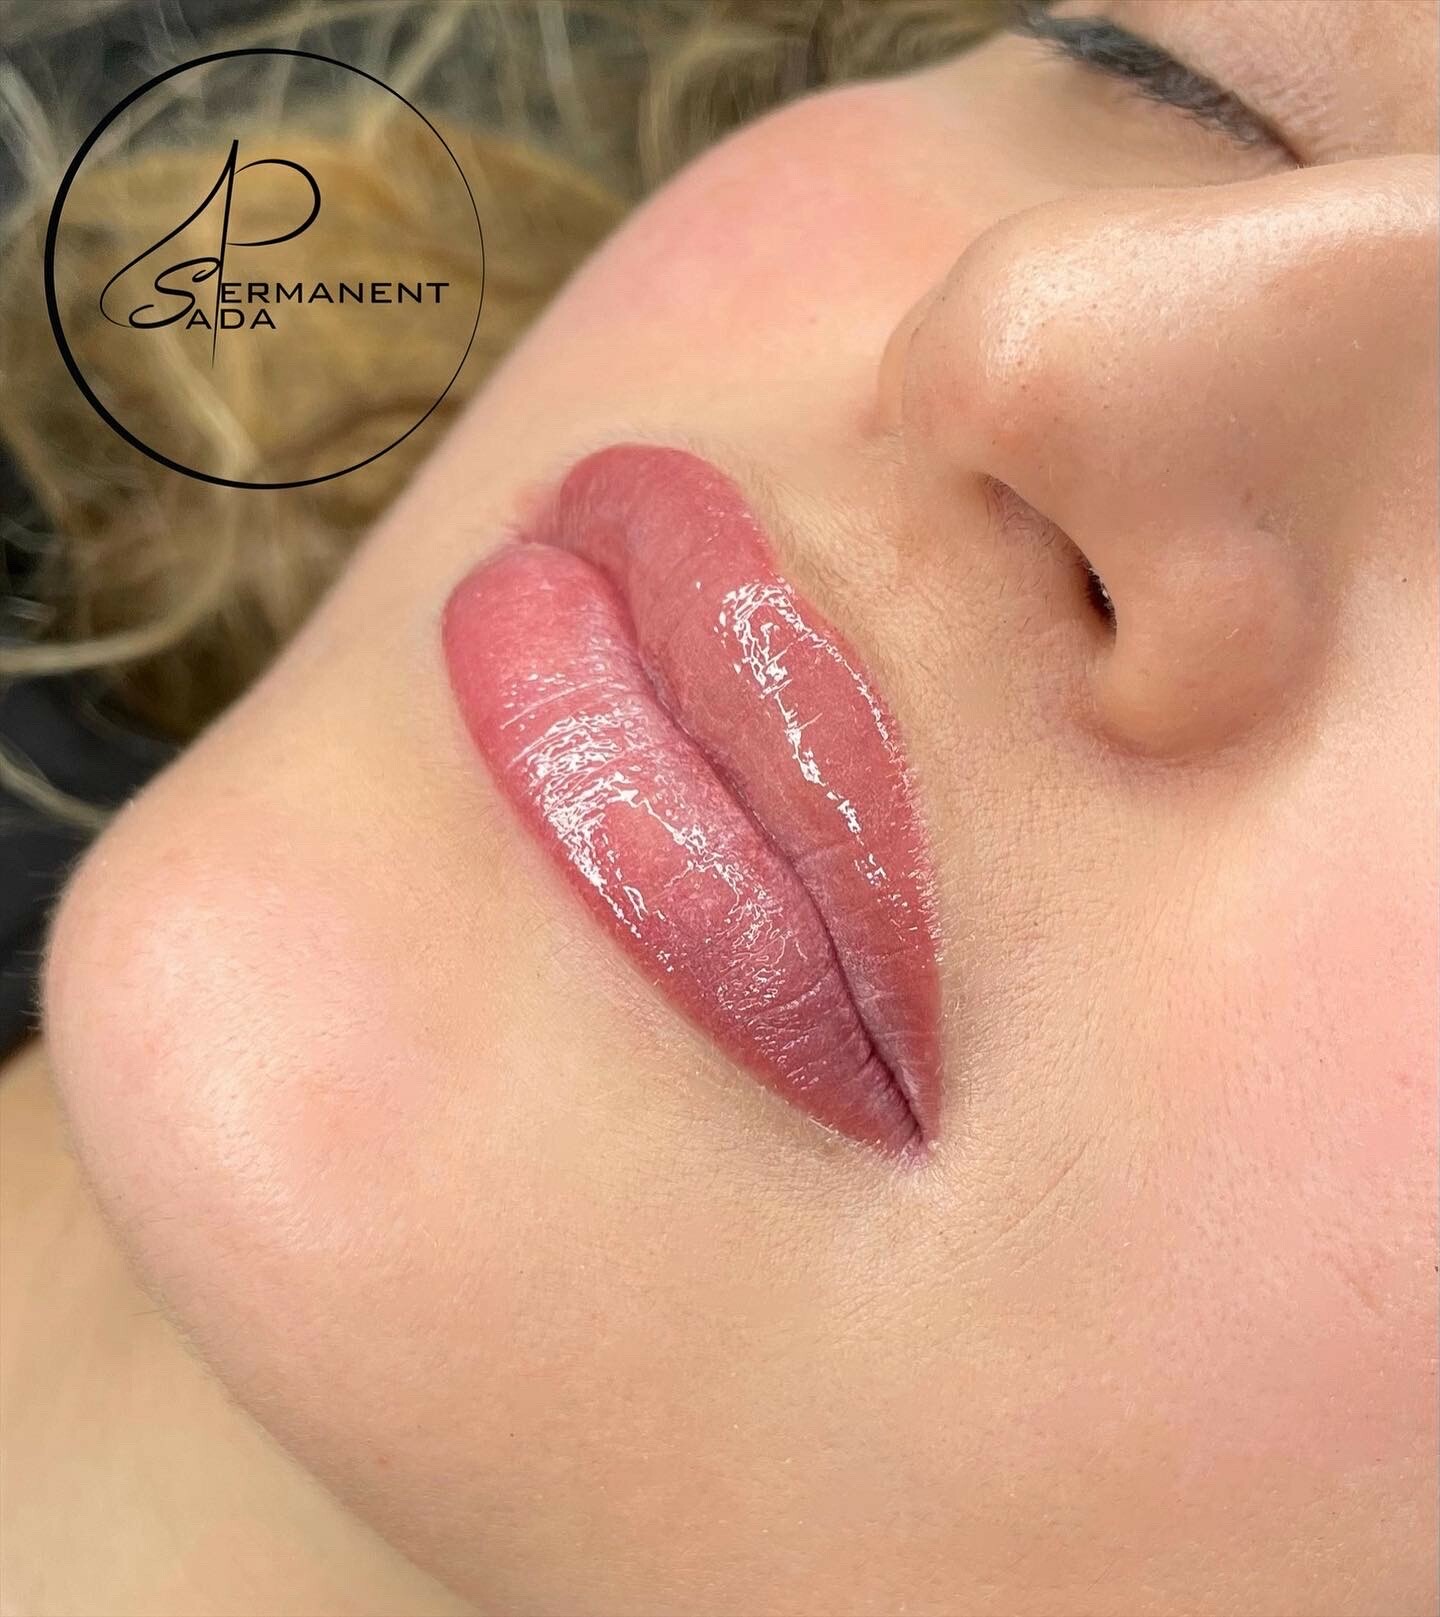
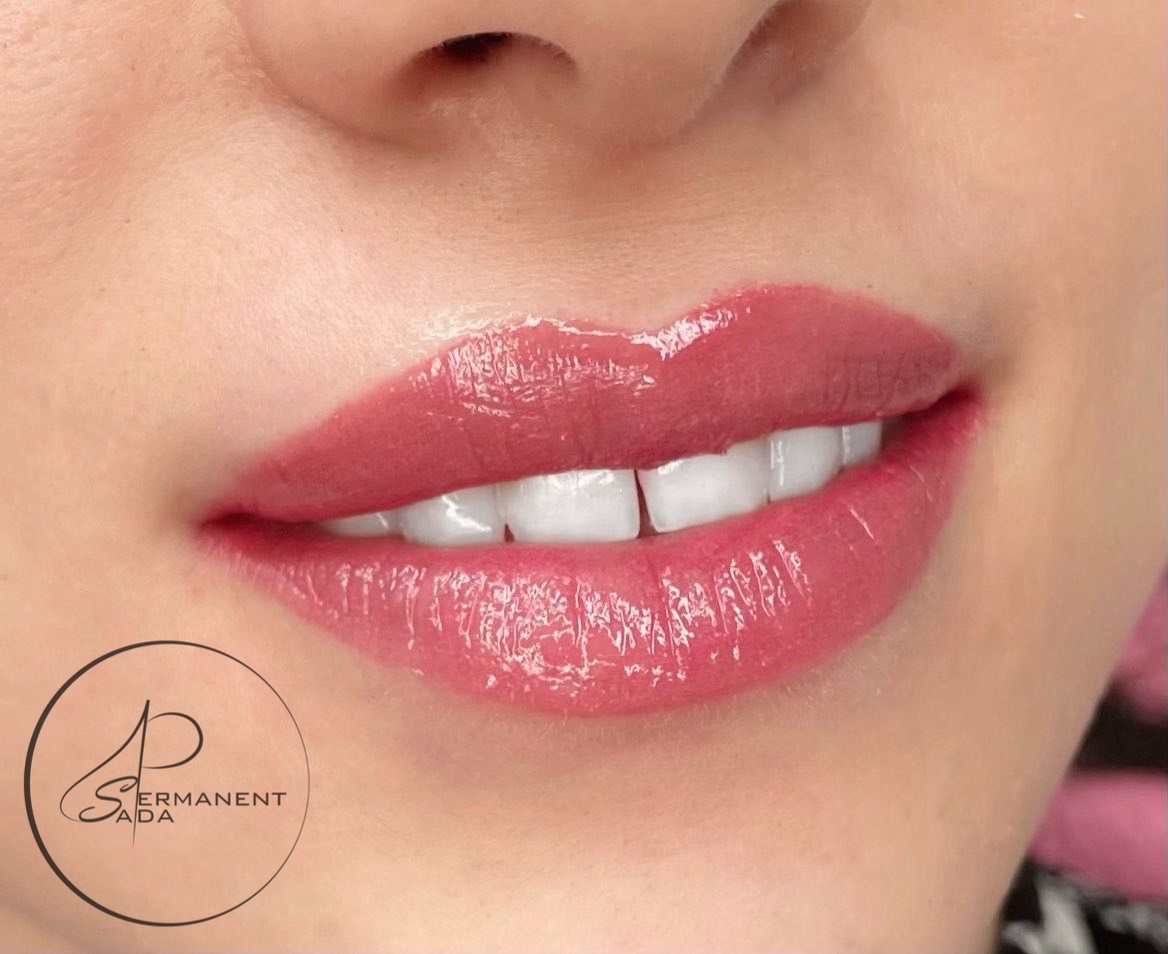
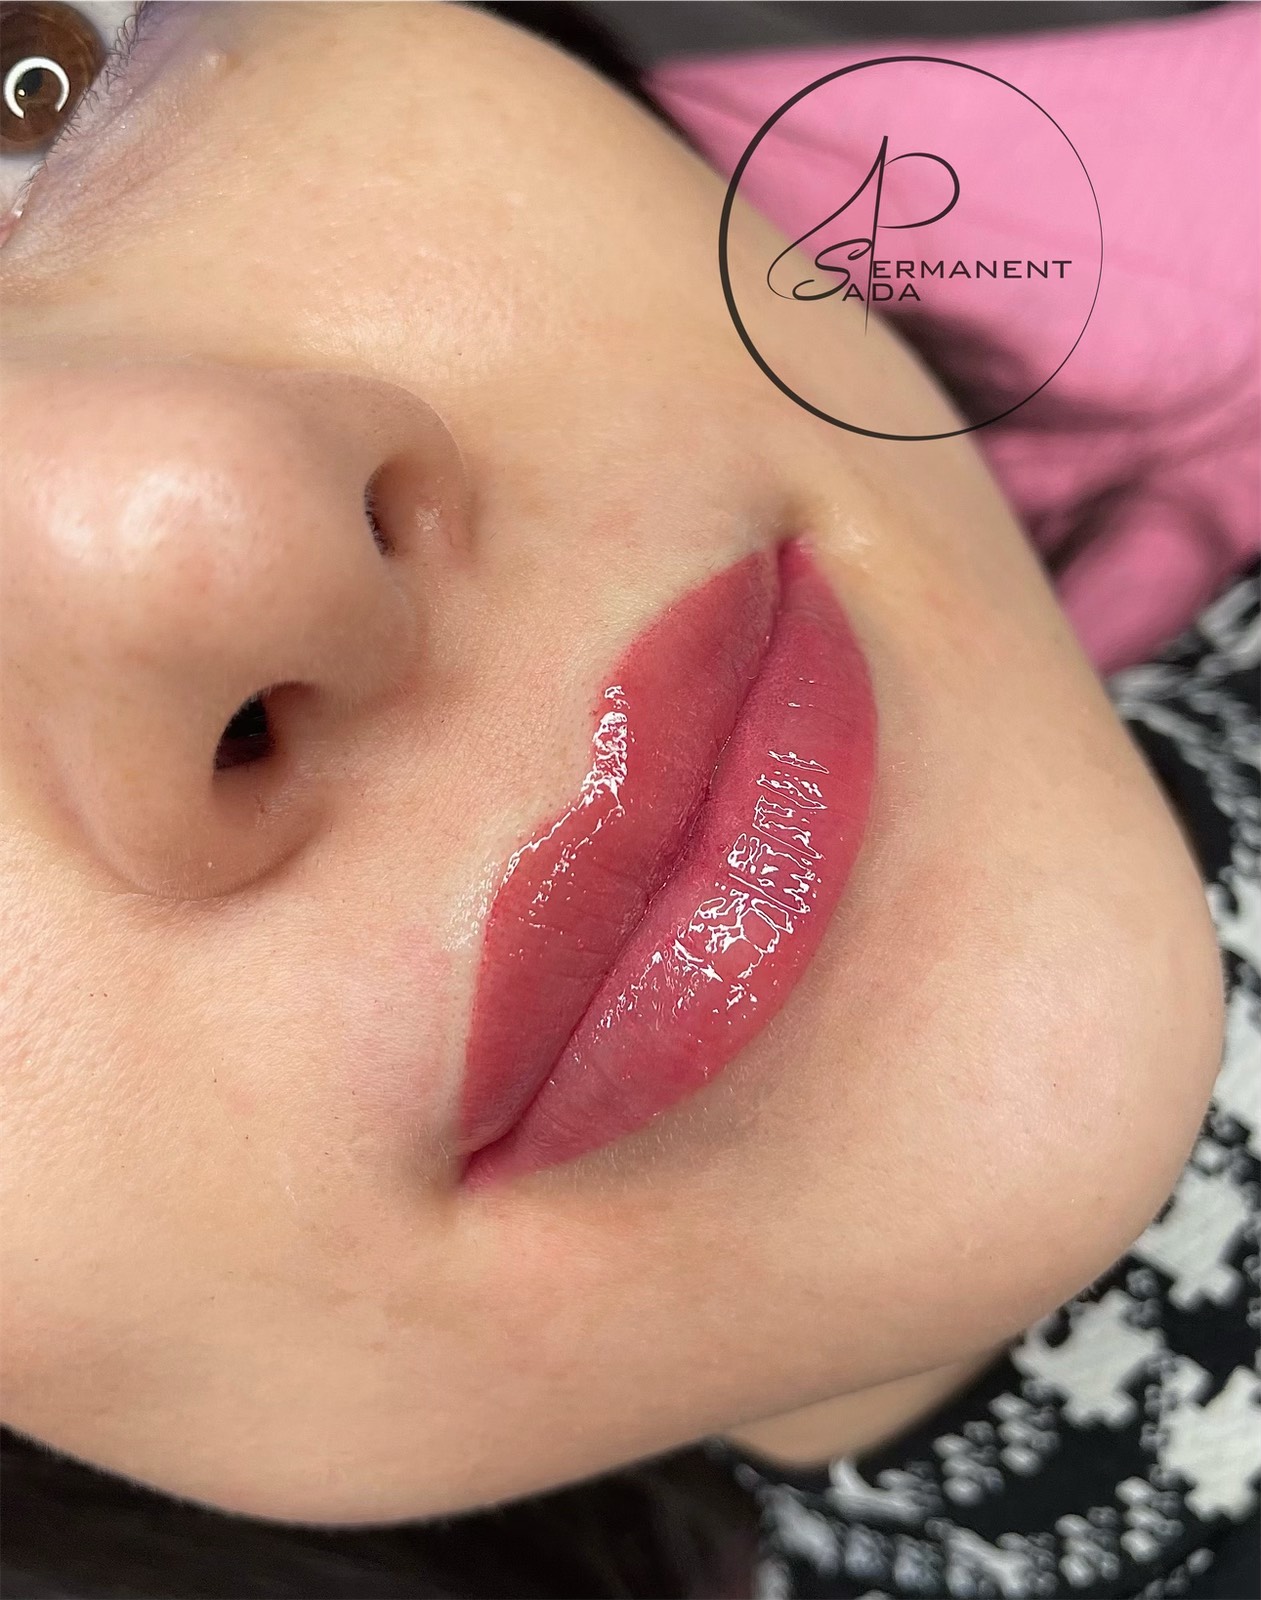
Cosmetic tattoo of the lips that enhances the beauty of the natural lip colour, improving the shape of the lips, giving definition and the illusion of fullness. Benefits of having lips blush: waterproof lips colour; Increase pigmentation for pale and aging lips; customize your lips shade; enhanced lips symmetry; colour correction for scars and uneven pigmentation. Treatment delivers very natural results, once healed. Filler is great for creating volume in your lips, but lip blush delivers a more natural look and give the illusion of fuller lips.
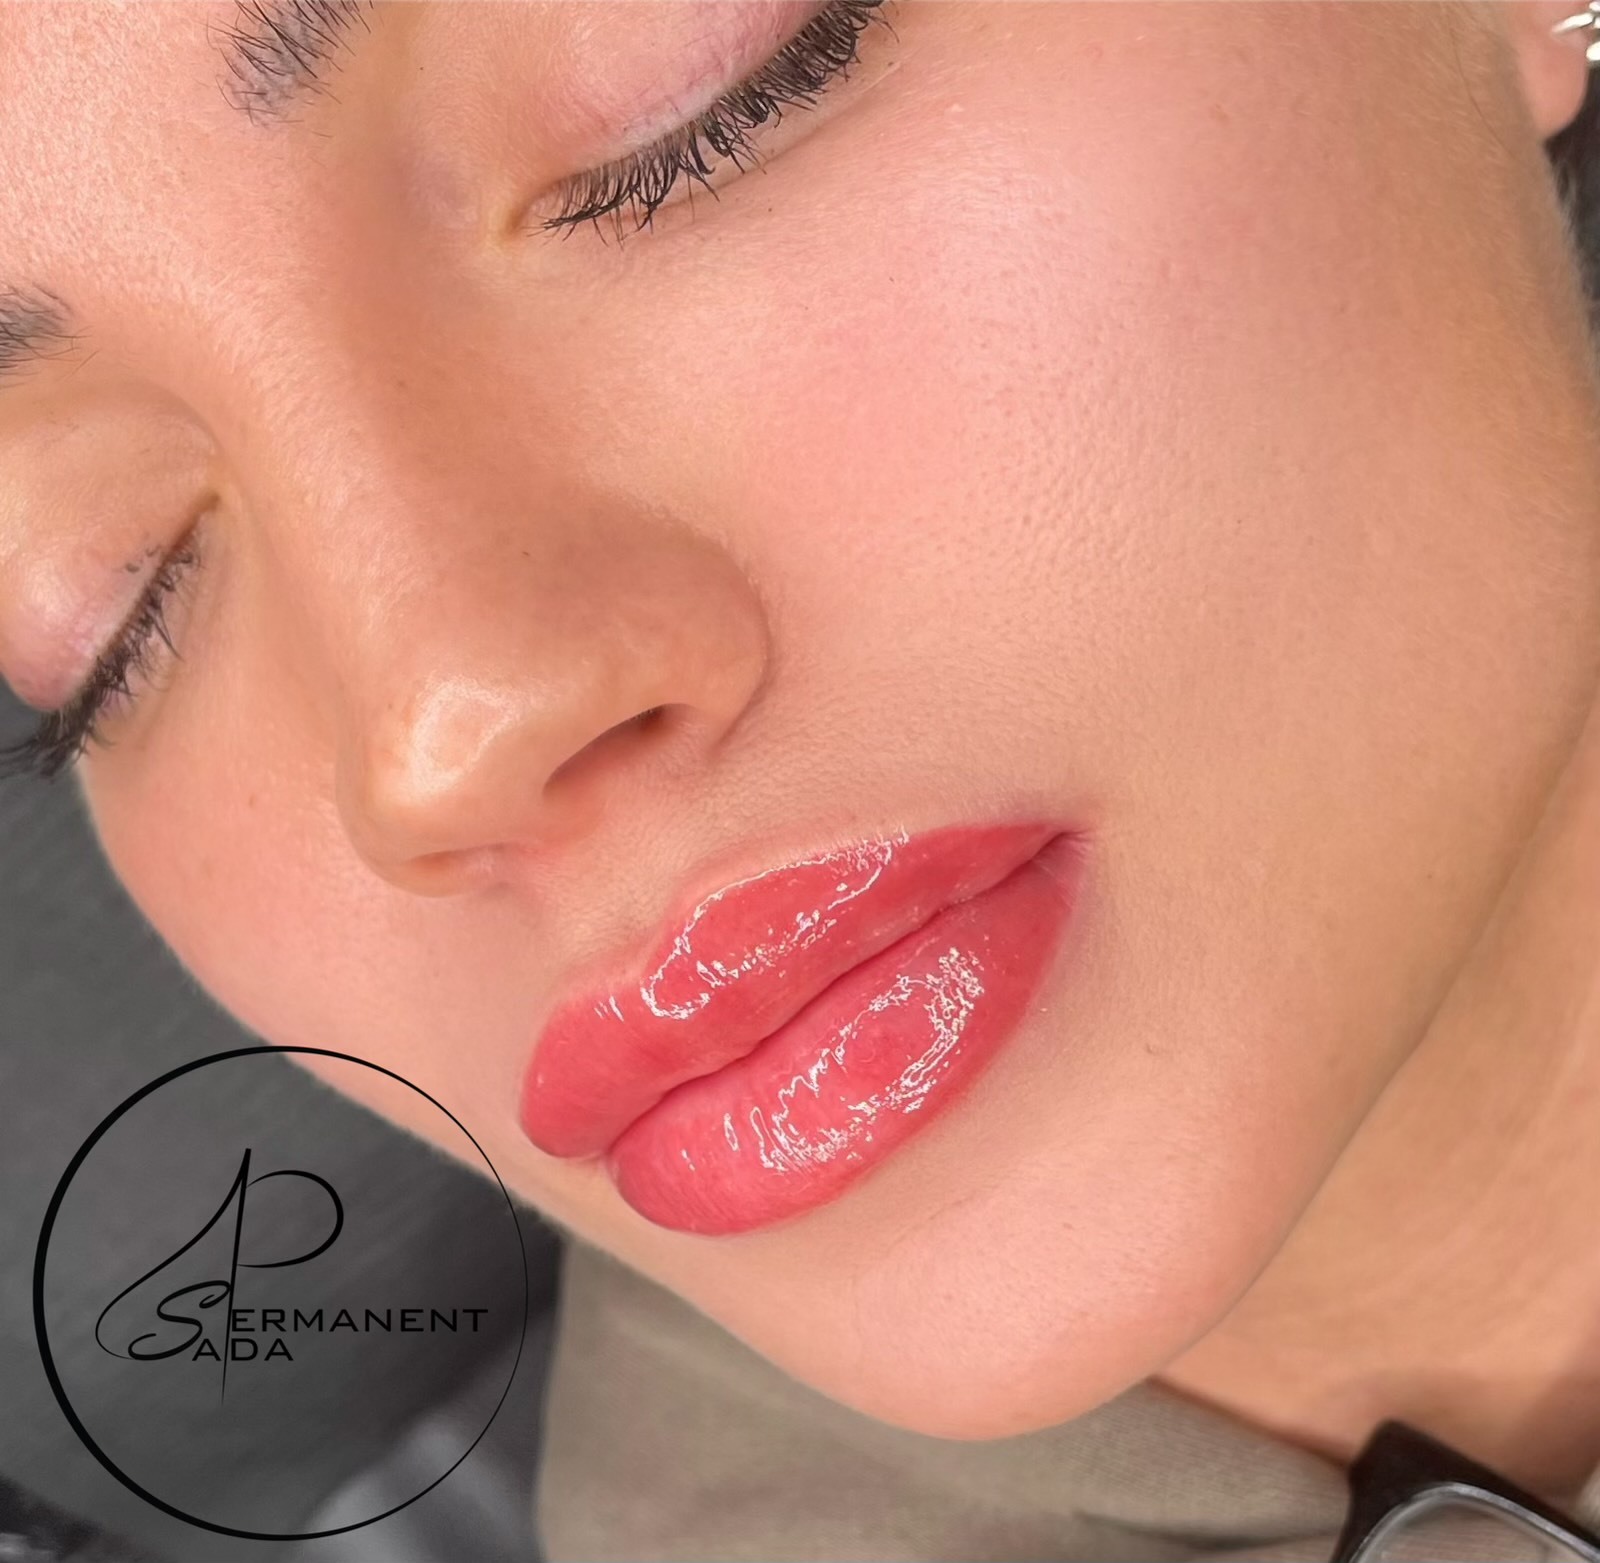
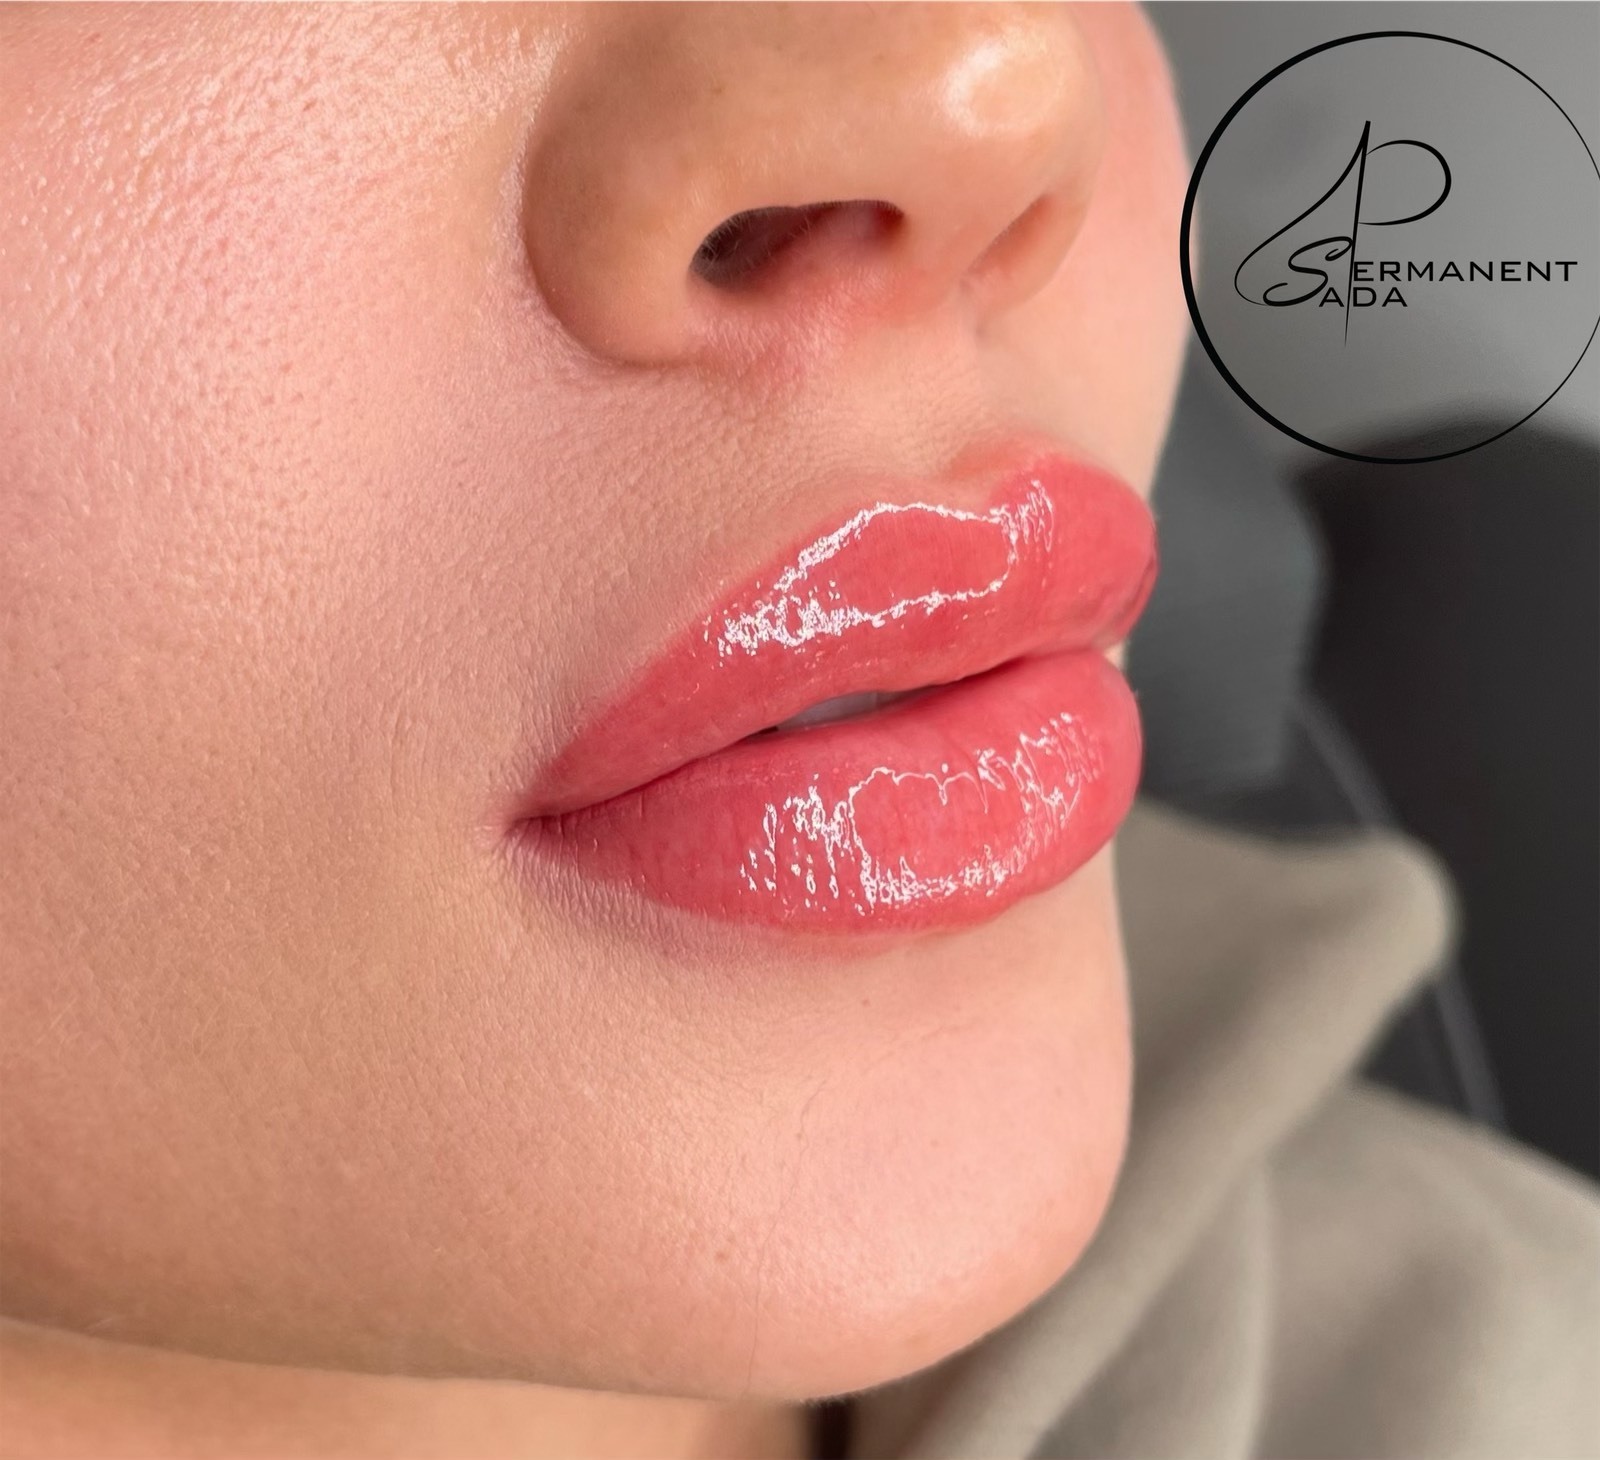
Frozen lip blush
Process combines with our artistic flair in shading, outlining, infilling and beautifying to create that dream lips. The basic idea is that we aren’t using only one colour, we’re using layers: main chosen colour and white pigment. In the end we’re getting a bright result, which gives an effect of hoarfrost. The lips look fresh, light and shiny.
Before procedure
Avoid sunbathing for one week.
Waxing and tinting eyebrows for one week.
No caffeine, alcohol, energy drinks or other blood thinners such as aspirin 24 hrs. before procedure.
After care instructions
Avoid increased sweating for one week. Practicing sport for one week. Swimming two weeks. Hot sauna, hot bath or jacuzzi two weeks.
Sun tanning or salon tanning two weeks.
Any laser or chemical treatments or peelings, and/or any creams containing Retin-A or glycolic acid on the face or neck one month.
Picking, peeling, or scratching of the micro pigmented area to avoid scarring of the area or removal of the pigment.
Unnecessary touching
Itching and flaking may appear during the first seven days.
Healing Process
The up’s and down’s of healing process after semi-permanent make up treatment can be a real rollercoaster of emotions but what you need is just a little bit of patience and you’ll be absolutely in love with your eyebrows!
DAY1
Perfect brows. Absolutely in love!
DAY 2-DAY 5
They are dark and so wide! Don’t worry, the colour will change into lighter once they are fully healed. Take care of your eyebrows as explained in aftercare provided by a master.
DAY 5-DAY 10
During this time the intense healing time is almost completed. Treated area becomes itchy and scabby. Don’t stress! That’s absolutely normal and almost everyone has to deal with this part of healing process. For some people might have more scabbing and others can barely have some.
DAY 10-DAY 15
Scabs are coming off and your brows should look lighter. It might look that skin didn’t take very well the pigment but the healing is not finished! They might look very light and even patchy. It will go away in a few days and colour will be visible again.
DAY 15-DAY 30
Your eyebrow healing process is almost done! Brows are about to take the final shape and colour. They still might look patchy but don’t worry it’s still not the end. At the end of the fourth week after the treatment you will see the real result of how your brows will look.
TOUCH UP DAY
The healing is finished! Depending on how well your skin took the pigment as brows might look light or patchy in a touch up appointment all imperfections can be fixed for the most perfect look! After the touch up your eyebrows will get their final shape and colour.
Touch up is done after 6-8 weeks of having new session of semi-permanent make up.
The up’s and down’s of healing process after semi-permanent make up treatment can be a real rollercoaster of emotions but what you need is just a little bit of patience and you’ll be absolutely in love with your eyebrows!
DAY1
10.00 – 12.30 Theory
12.30 – 13.00 Short break
13.00 – 15.00 Drawing practice on latex (fake skin)
15.00 – 16.30 Demonstration done by teacher (Teacher will show brow technique on live model)
16.30 – 17.00 Homework, Questions, answers and end of day 1.
DAY 2
10.00 – 11.00 Homework overview, questions, practice on latex (fake skin)
11.00 – 13.00 Practise brows on live model full support from teacher)
13.00 – 14.00 Short break
14.00 – 16.00 Practise brows on live model
16.00 – 17.00 Questions, answers and CERTIFICATE, pictures, the end of training course.
DAY1
10.00 – 12.30 Theory
12.30 – 13.00 Short break
13.00 – 15.00 Drawing practice on paper and latex (fake skin)
15.00 – 16.30 Demonstration done by teacher (Teacher will show brow technique on live model)
16.30 – 17.00 Homework, Questions, answers and end of day 1.
DAY 2
10.00 – 11.00 Homework overview, questions, practice on latex (fake skin)
11.00 – 13.00 Practise brows on live model full support from teacher)
13.00 – 14.00 Short break
14.00 – 16.00 Practise brows on live model
16.00 – 17.00 Questions, discussions about practice work, answers and end of day 2.
DAY 3
10.00 – 11.00 Questions and practice on latex (fake skin)
11.00 – 13.00 Practise on lips live model (full support from teacher)
13.00 – 14.00 Short break
14.00 – 16.00 Practice on lips live model
16.00– 17.00 Questions, answers and the best part of three days of hard work – CERTIFICATE, pictures, the end of training course.
DAY 1
10.00 – 12.30 Theory
12.30 – 13.00 Short break
13.00 – 15.00 Drawing practice on paper and latex (fake skin)
15.00 – 16.30 Demonstration done by teacher (Teacher will show technique on live model)
16.30 – 17.00 Questions, answers and end of day 1.
DAY 2
10.00 – 11.00 Questions and practice on latex (fake skin)
11.00 – 13.00 Practise on fake skin
13.00 – 14.00 Short break
14.00 – 16.00 Practise on live model (full support from teacher)
16.00 – 17.00 Questions, discussions about practice work, answers and end of day 2.
DAY 3
10.00 – 11.00 Questions and practice on latex (fake skin)
11.00 – 13.00 Practise on live model (full support from teacher)
13.00 – 14.00 Short break
14.00 – 16.00 Theory exam
16.00– 17.00 Questions, answers and the best part of three days of hard work – CERTIFICATE, pictures, the end of training course.
